You are here: Experiment Guide > Imaging Modes > Electrochemistry > EC Fluid Probe Holder Setup

EC Fluid Probe Holder Setup

  1. Place the EC fluid probe holder on the existing probe stand using the included curved tweezers (Ted Pella 1663-12).
NOTE: Use the probe station with the bent wire, shown in Figure 1.

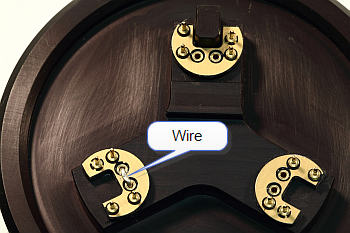
Figure 1: Place the EC fluid probe holder on the probe stand

  1. Press down on the EC fluid probe holder to lift the clamp wire. Then insert the AFM cantilever substrate under the clamp wire and into the cutout as shown by the blue arrow in Figure 2.

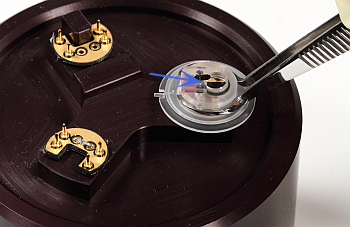
Figure 2: Press down on the EC fluid probe holder

  1. Place the boot on the probe holder:
  1. ScanAsyst/Contact Mode EC Probe Holder or TappingMode EC Probe Holder: Using plastic tweezers, place the Kalrez® electrometric boot in the grooved cutout on the bottom of the EC fluid probe holder as shown in Figure 3. The boot helps seal the cell to minimize evaporation and prevents harmful liquids from contacting Dimension microscope components.


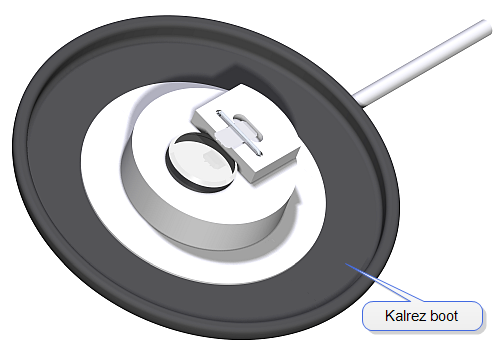
Figure 3: ScanAsyst/Contact Mode EC Probe Holder or TappingMode EC Probe Holder (top) with Kalrez splash shield (bottom)

Start by inserting the inner perimeter of the splash guard into the groove, then work around the circumference to seat the boot in the groove. Check to see that the boot sits evenly in the groove without warping either the guard or the probe holder. Rotate the boot to ensure proper seating.

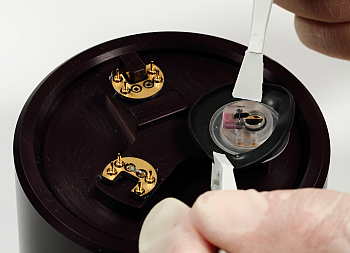
Figure 4: Using plastic tweezers, place the boot in the grooved cutout.

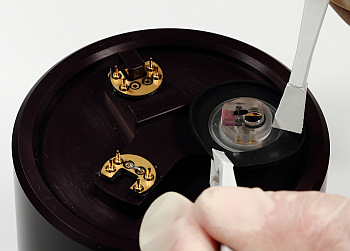
Figure 5: Using the tweezers, work around the groove to seat the boot.

Figure 6: The installed boot will be flat.

  1. High Efficiency Direct Drive TappingMode Fluid Probe Holder: Place the Viton splash guard in the grooved cutout on the top of the EC fluid probe holder as shown in Figure 7. The splash guard helps prevent harmful liquids from contacting the Dimension microscope components. Note the orientation of the notch in the side of the splash guard.

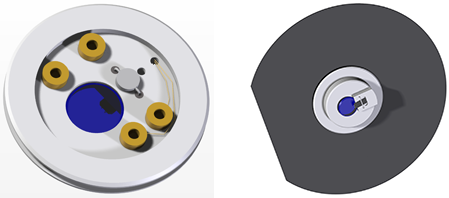
Figure 7: EC fluid probe holder (left) with Viton splash guard (right)
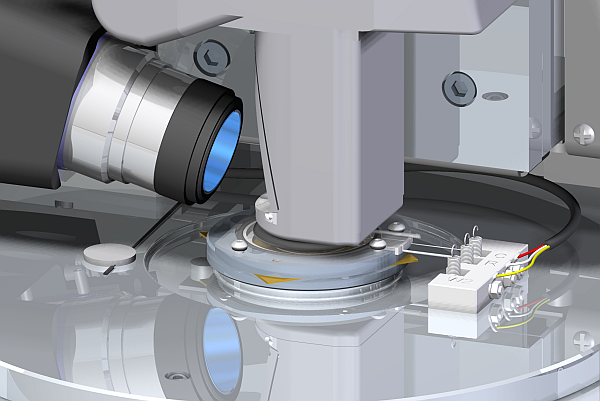
  1. Remove the EC fluid probe holder from the stand using the included curved tweezers.
  2. Place the fluid probe holder on the Dimension Microscope head. See Figure 8.

Figure 8: The TappingMode EC Probe Holder (top) and High Efficiency Direct Drive TappingMode Fluid Probe Holder (bottom) on the Dimension Icon Microscope head

Return to Setup Procedures.


www.bruker.com Bruker Corporation
www.brukerafmprobes.com 112 Robin Hill Rd.
nanoscaleworld.bruker-axs.com/nanoscaleworld/ Santa Barbara, CA 93117
   
  Customer Support: (800) 873-9750
  Copyright 2010, 2011. All Rights Reserved.